Posts

Showing posts from October, 2015

ESXi 6.0 Configuration

Image
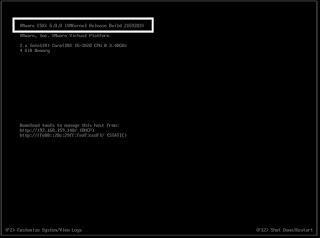
                                     This post describes how to configure ESXi 6.0                 Step 1 : Connect to the DCUI console of the host                           Step 2: Press “F2”, enter the root credentials and press “Enter” to login.            Step 3: Select “Configure Management Network” and press “Enter”.         Step 4: Select “Network Adapters” to select additional “vmnics” for the Management vSphere         Standard Switch.           Step 5: Select “VLAN (optional)” to configure a VLAN for the Management VMkernel.          Note: If it is an access port then no need to provide Vlan id, but if it is a Trunk port then Vlan id needs to be defined.         Step 6: Select “IPv4 Configuration” to configure DHCPv4, IPv4 Static or IPv4 Disabled.             Step 7: Select “IPv6 Configuration” to configure DHCPv6, IPv6 Static or IPv6 Disabled.         Step 8: S

Change DHCP option sets on AWS

Image
This post describes how to change DNS servers IPs of Windows server on AWS     NOTE: Do not change DNS servers directly inside OS of server installed on AWS. By Changing DNS servers from OS will break the instance and make it inaccessible     STEP1: Check current DHCP option in AWS and name of DHCP options set attached to VPC   By default DHCP option set is created and attached to VPC.   Login to AWS console and go to VPC. Click DHCP options sets           STEP2: Click on Create DHCP options set It will prompt for details       STEP3:  Fill the details as per your requirement. Domain name will cange Domain suffix     STEP4:  Verify DHCP Option set     STEP5: Attach new DHCP option set by right clicking on VPC and select edit DHCP option set       STEP6: Change the DHCP option         STEP7: Verify attachment of new DHCP option set to VPC     STEP8: Check existing settings on Server

Increase C drive size of windows server on AWS

Image
This post describes how to Increase C drive of Windows server on AWS     Step 1: Note current C drive space on windows server (in this e.g. it is 30 GB)           Step 2: Login to AWS console. Click on root device of instance for which C drive needs to be increased and note down EBS ID of volume       Step 3: Search volume by volume id noted in previous step and  t ake snapshot of volume by right clicking on the volume       Step 4: Enter name and description of snapshot   Step 5: search snapshot and Create new volume by right clicking snapshot     Step 6: Select type of volume Select size (mention the new size that you want). I have increased by 10 GB hence new size is 40 GB Select availability zone. Availability zone should be same zone in which instance is available. NOTE: You cannot attach volume created in another availability zone then from instance         Step 7: No te EBS ID of new volume

Login to Windows server on AWS

Image
This post describes how to login to Windows server on AWS       Step 1: Login to AWS console     Step 2: Click on EC2   Step 3: Go to Instances   Step 4: Right click on instance and select Get windows password       Step 5: It will prompt for security key     Step 6: Copy content of certificate key which was downloaded at the time of Keypair creation      Step 7: It will show administrator password.  Note this password to login to server     Step 8: Note down public DNS name of server to access it   Step 9: Use RDP tool to access the instance launched on AWS   Step 10: Enter administrator password which we have obtained in earlier steps       

Build Server on AWS Cloud

Image
This post describes how to build server on AWS Step 1: Login to AWS console Step 2: Click on EC2   Step 3: It will open EC2 dashboard, Click on Launch Instance  Step 4:  It will take you to step of selecting AMI AMI is Golden Image of server You can select your own AMI (Created by you)/Market place AMI(Created by vendors and sold)/Community AMI(created by users in community) Step 5:  Select AMI Step 6:  Select Instance type Refer link http://aws.amazon.com/ec2/instance-types/ for current instance types with features and resources. Step 7:  Select number of instances Step 8: Select your VPC or create your new VPC Step 9: Select subnet in which you want to deploy the server or create your subnet Step 10: Click on add storage Step 11: Select size of storage of C drive or root volume and attach more volumes if required  Step 12: Select your TAG e.g. Name (Name of instance). You can c